Normalmente en los trabajos de punto de cruz o en bordado tradicional, no se recomienda anudar el hilo, ya que se crean bultos en el tejido. La excepción son los trabajos realizados sobre artículos tejidos, como prendas de vestir y artículos para el hogar, que van a sufrir un uso y un lavado repetidos. En este caso, para asegurarse de que las puntadas permanecen firmes, se puede hacer un pequeño nudo tanto al inicio como al final de la labor.
Para crear un bordado "sin baches", DMC recomienda empezar a bordar con uno de estos tres métodos:
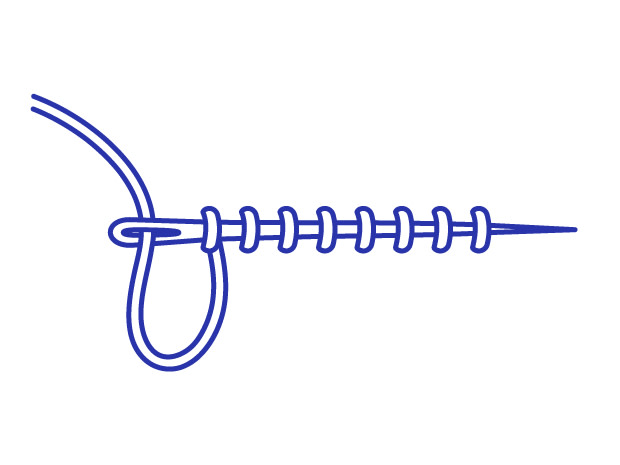
Puntada de sujección
Esta técnica es la mejor para iniciar nuestros trabajos de bordado.
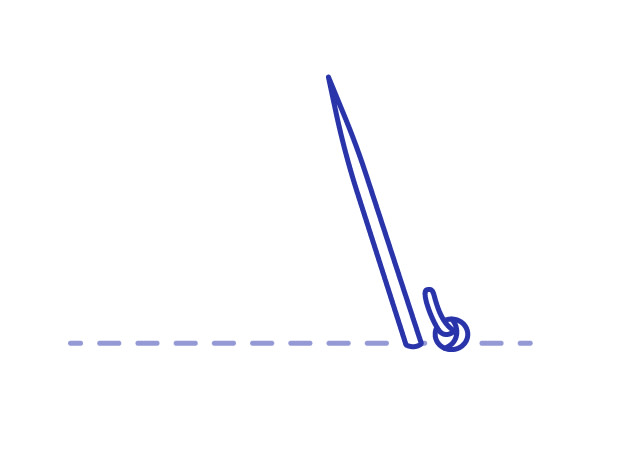
Anudar el extremo del hilo y pasar la aguja de delante de la tela hacia atrás a unos 2,5 cm del punto de partida, en una zona que quede cubierta por la costura.
Subir la aguja a través de la tela, cerca del nudo y hacer dos pequeñas puntadas de sujeción.
Sacar la aguja en el punto donde se va a comenzar el bordado y empezar a bordar. Cortar el nudo sobrante lo más cerca posible de la tela.
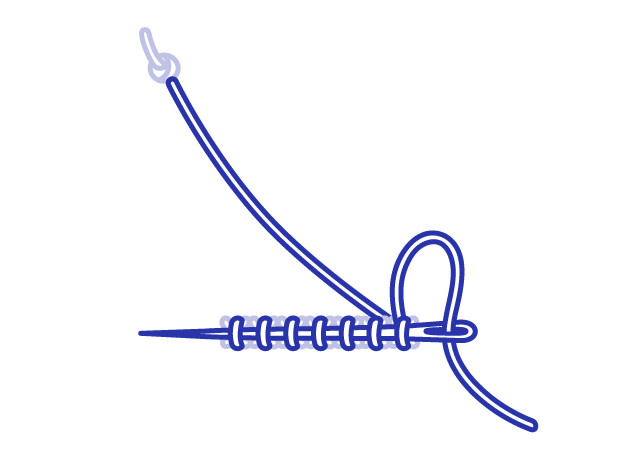
Nudo alejado
Otra técnica fácil cuando se empieza a bordar un nuevo diseño es el nudo alejado.
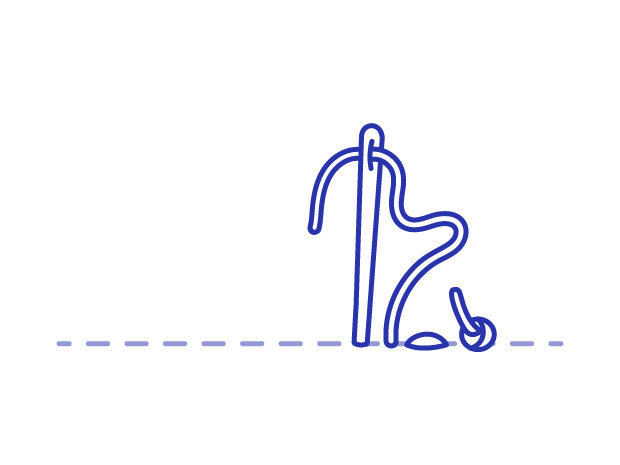
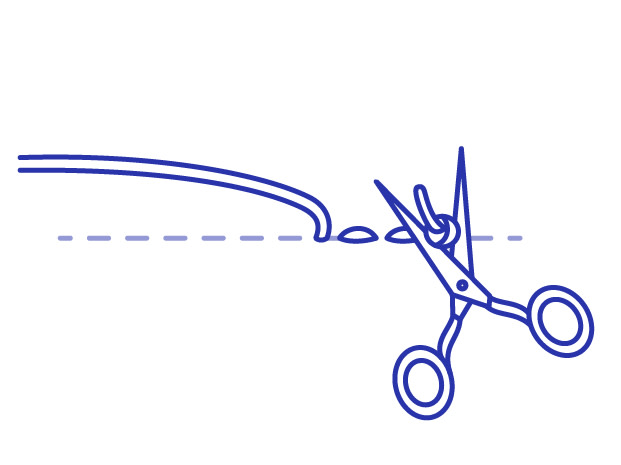
Hacer un nudo en el extremo del hilo y pasar la aguja de delante de la tela hacia atrás a unos 10 cm del punto de partida y comienzar a bordar. (Nota: Colocar el nudo alejado en una zona de a tela que vaya a quedar tapada por el bordado para que no se vea el agujero en la tela).
Terminar de bordar con ese hilo y, llevando la aguja a la parte posterior de la labor,entretejer por debajo de algunas de las puntadas que se han hecho para fijar el hilo.
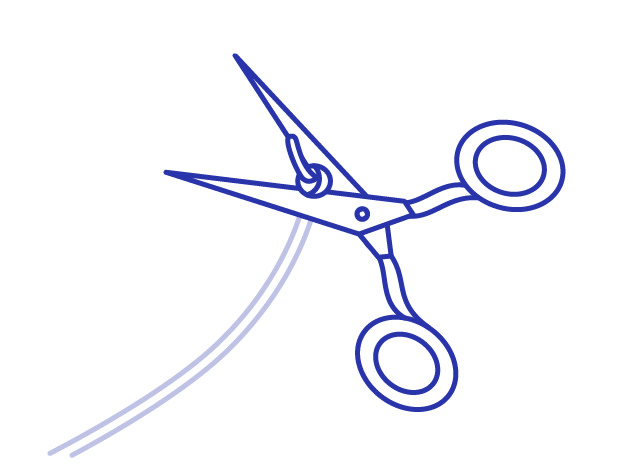
Cortar el nudo de la parte delantera de la labor lo más cerca posible de la tela. Dar la vuelta a la labor, volver a enhebrar la aguja con la cola del hilo y pasarla por varias puntadas del revés para asegurarla.
Hacer un nudo en el extremo del hilo y pasar la aguja de delante de la tela hacia atrás a unos 10 cm del punto de partida y comienzar a bordar. (Nota: Colocar el nudo alejado en una zona de a tela que vaya a quedar tapada por el bordado para que no se vea el agujero en la tela).
Terminar de bordar con ese hilo y, llevando la aguja a la parte posterior de la labor,entretejer por debajo de algunas de las puntadas que se han hecho para fijar el hilo.
Cortar el nudo de la parte delantera de la labor lo más cerca posible de la tela. Dar la vuelta a la labor, volver a enhebrar la aguja con la cola del hilo y pasarla por varias puntadas del revés para asegurarla.
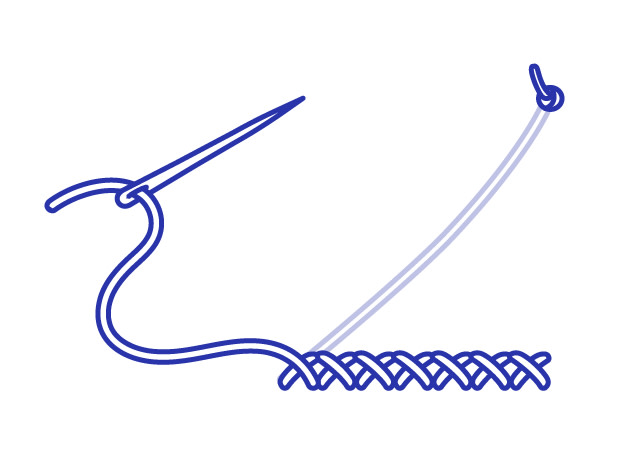
Puntada por encima
Este método va bien para los trabajos de tapicería, puntos contados y punto de cruz.

Sacar la aguja enhebrada por el anverso de la tela, dejando una cola de hilo de 2,5 cm en la parte posterior.
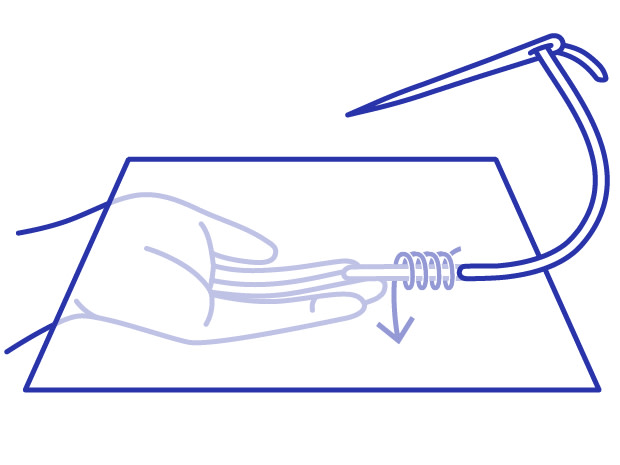
Sujetar el extremo final del hilo contra el revés de la tela en la dirección del bordado y realizar las primeras 4 ó 5 puntadas por encima para fijarlo en el sitio.
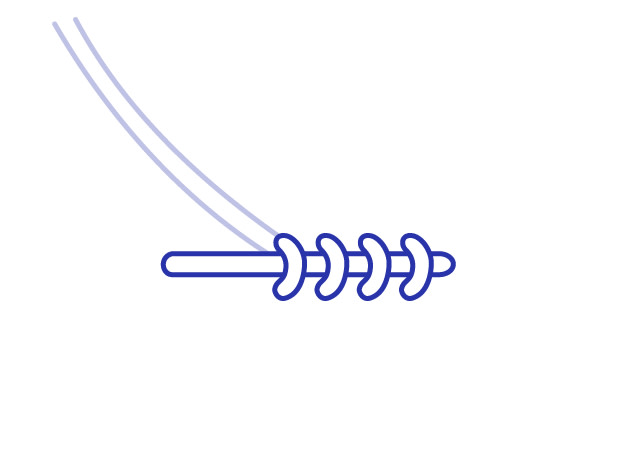
Cubrir la hebra sobrante con el hilo y corta el resto del hilo que quede suelto antes de continuar bordando. A lo largo del trabajo, se pueden asegurar nuevos hilos tejiendo el hilo bajo varias puntadas adyacentes por el revés.
Sacar la aguja enhebrada por el anverso de la tela, dejando una cola de hilo de 2,5 cm en la parte posterior.
Sujetar el extremo final del hilo contra el revés de la tela en la dirección del bordado y realizar las primeras 4 ó 5 puntadas por encima para fijarlo en el sitio.
Cubrir la hebra sobrante con el hilo y corta el resto del hilo que quede suelto antes de continuar bordando. A lo largo del trabajo, se pueden asegurar nuevos hilos tejiendo el hilo bajo varias puntadas adyacentes por el revés.
Acabar la labor o cambiar de hilo
Para dejar de bordar con un hilo, porque es demasiado corto, se ha terminado una sección o se quiere cambiar de color, pasar la aguja enhebrada al revés de la labor y pasarla por debajo de las últimas puntadas del revés de la tela para asegurarla. A continuación, cortar el hilo sobrante.
Para dejar de bordar con un hilo, porque es demasiado corto, se ha terminado una sección o se quiere cambiar de color, pasar la aguja enhebrada al revés de la labor y pasarla por debajo de las últimas puntadas del revés de la tela para asegurarla. A continuación, cortar el hilo sobrante.