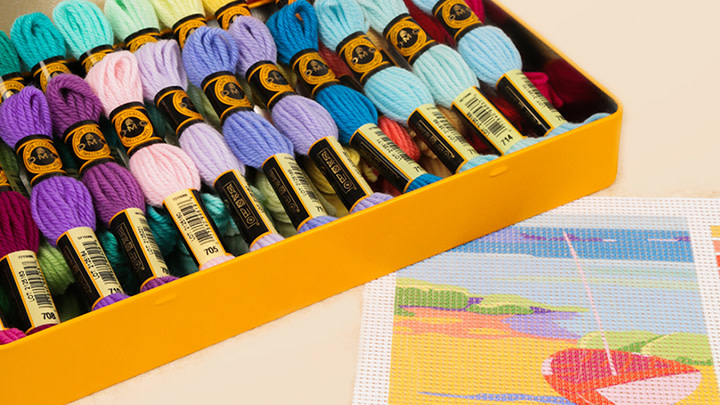
When the tapestry and needlepoint projects are finished they will need to be blocked. Blocking is straightens and squares the canvas back into its original shape. Blocking can be done with a bit of time and patience or you can contact your local Needlework shop and have a professional block the canvas for you. In this article we describe the steps for you to block your canvas at home.
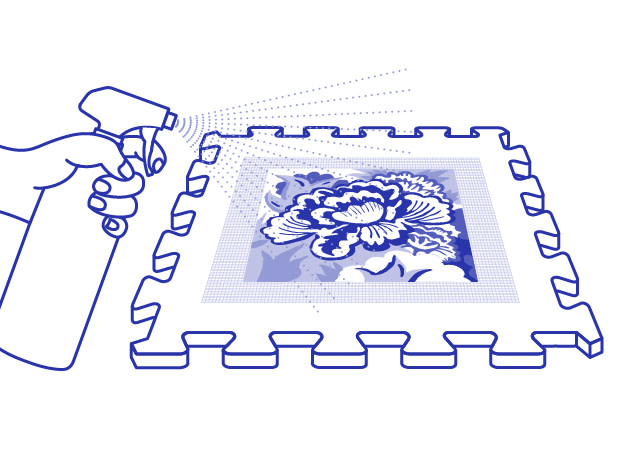
Dampen the tapestry/needlepoint by spraying the entire canvas with warm water. Using a liberal amount of water to dampen the surface but not so much as to saturate it, let the canvas rest for 5 minutes to relax the fibers. To remove excess water from the canvas, pat the surface gently with a clean towel.
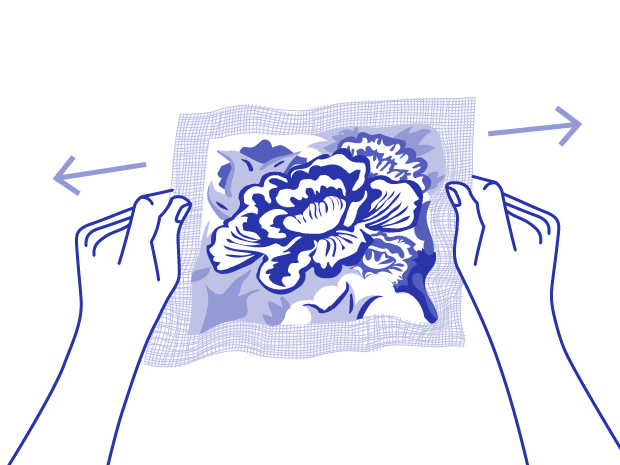
Hold the canvas in your hands and stretch it in the direction opposite to the distortion. Most stitched canvases lean toward the right. To help reshape the canvas, hold the upper left and lower right corners and pull it back into a reasonable alignment. Never cut the canvas before blocking. The selvage strips are used to hold the pins when stretching.
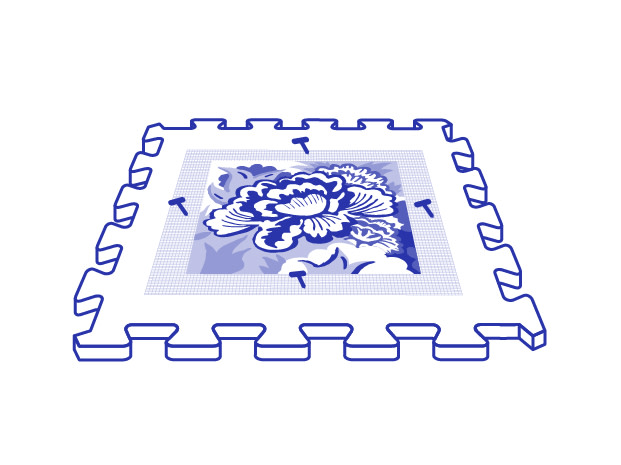
Using the blocking board grids as your guide, press a T pin into the centre of the top selvage strip on the canvas. Gently stretch the canvas downwards keeping the canvas threads vertical and tack the center of the bottom strip onto the board. Repeat the method on the left and right sides keeping the threads horizontal and at right angles to the vertical threads.
Dampen the tapestry/needlepoint by spraying the entire canvas with warm water. Using a liberal amount of water to dampen the surface but not so much as to saturate it, let the canvas rest for 5 minutes to relax the fibers. To remove excess water from the canvas, pat the surface gently with a clean towel.
Hold the canvas in your hands and stretch it in the direction opposite to the distortion. Most stitched canvases lean toward the right. To help reshape the canvas, hold the upper left and lower right corners and pull it back into a reasonable alignment. Never cut the canvas before blocking. The selvage strips are used to hold the pins when stretching.
Using the blocking board grids as your guide, press a T pin into the centre of the top selvage strip on the canvas. Gently stretch the canvas downwards keeping the canvas threads vertical and tack the center of the bottom strip onto the board. Repeat the method on the left and right sides keeping the threads horizontal and at right angles to the vertical threads.
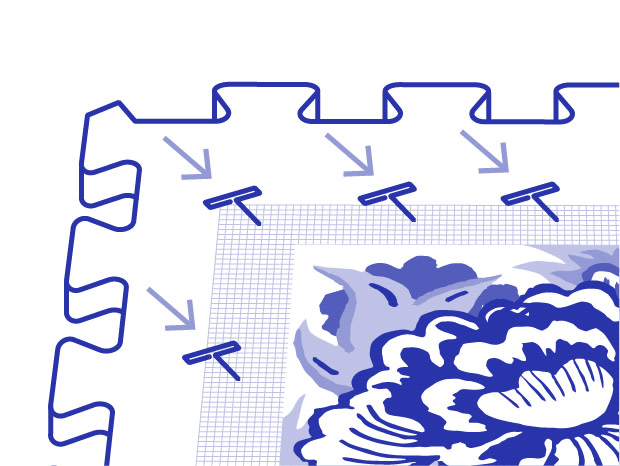
Working outwards from each center pin continue to stretch and pin the canvas at 2cm (¾”) intervals. Add the pins a few at a time equally to all four sides as you work around the canvas. If the canvas starts to dry out, dampen it again and resume pinning.
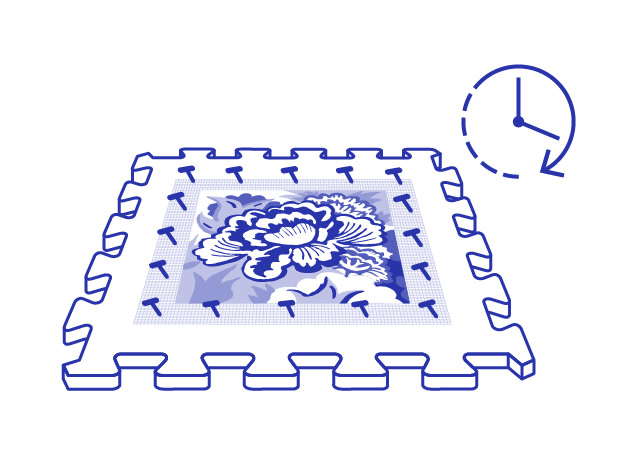
Once the canvas has been fully pinned to the blocking board, lightly spray the surface again. Dry the piece of work dry at room temperature and out of direct sunlight. Drying can take several days or longer depending on the humidity and temperatures. Remove the pins only when the canvas is “bone dry”.
When dry the canvas should be straight and ready for finishing. If the design is still a little distorted, simply repeat the blocking process. Some canvases require multiple repetitions of the blocking process to get them back into shape. While the design is drying, keep the board flat to avoid water marks on the canvas.
Working outwards from each center pin continue to stretch and pin the canvas at 2cm (¾”) intervals. Add the pins a few at a time equally to all four sides as you work around the canvas. If the canvas starts to dry out, dampen it again and resume pinning.
Once the canvas has been fully pinned to the blocking board, lightly spray the surface again. Dry the piece of work dry at room temperature and out of direct sunlight. Drying can take several days or longer depending on the humidity and temperatures. Remove the pins only when the canvas is “bone dry”.
When dry the canvas should be straight and ready for finishing. If the design is still a little distorted, simply repeat the blocking process. Some canvases require multiple repetitions of the blocking process to get them back into shape. While the design is drying, keep the board flat to avoid water marks on the canvas.