This guide provides step by step diagrams for popular stitches used in tapestry and needlepoint. It's designed to be a companion to our video tutorials which can be viewed here. Use the links below to jump to specific stitches or scroll through them all for inspiration.
Use these links to jump to the steps and diagrams for key stitches.
Tent stitch is the smallest canvaswork stitch you can do. It covers one intersection of the canvas and for some tapestry projects it is the only stitch you will use. However, there are three ways to do this stitch, they all look the same on the front but continental is hardwearing, basketweave is the most durable and less likely to distort the canvas and half cross is most economical because it uses less thread. Choose the one you prefer for your project.
Tent Stitch - Basketweave
This is the best form of tent stitch for large areas and especially when stitching items that need to be very hard wearing, like seat bases, cushions and kneelers. The stitches are worked in diagonal rows with the stitches of one row fitting between the stitches of the previous row. It creates crossed stitches on the back of your canvas that give this variation its name because they look like a woven basket. It's what makes the stitch very hardwearing.
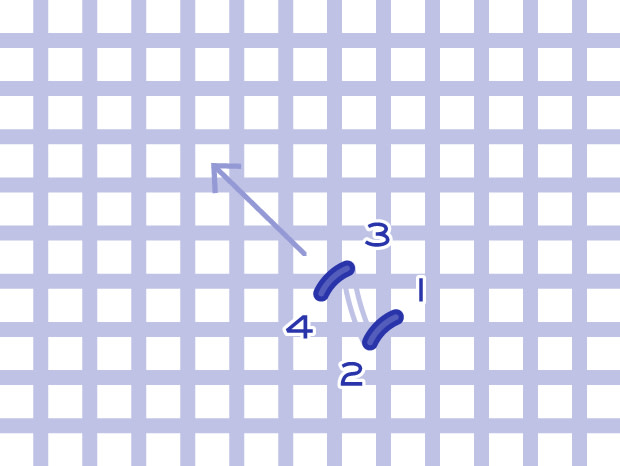
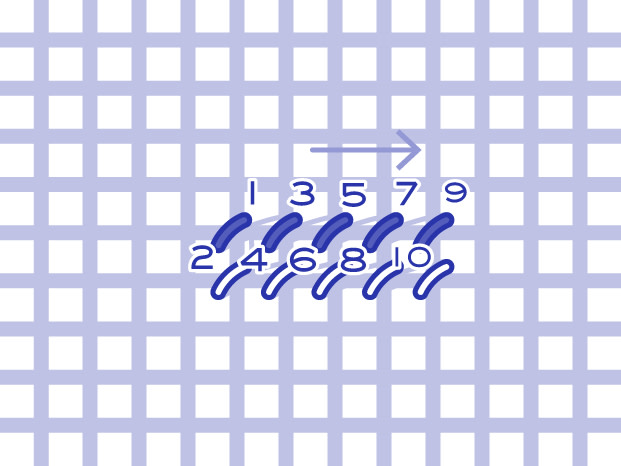
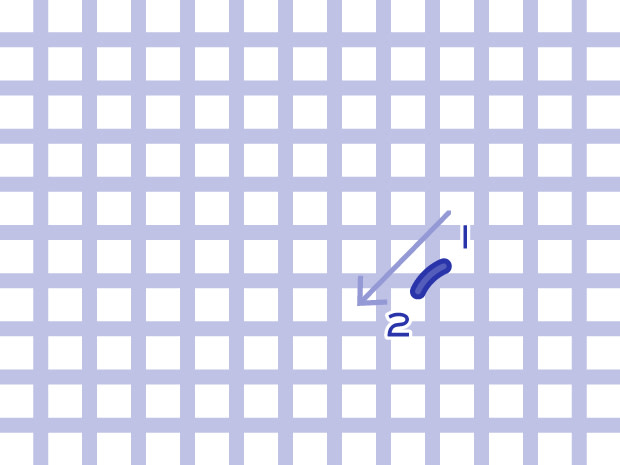
Start at the bottom right hand corner of the section you want to fill. Make the first stitch over an intersection of the canvas from top right (1) to bottom left.(2) Bring your needle up two holes above where you finished the first stitch (3) and make your next stitch by taking it back down to the bottom left (4).

Continue working in diagonal row, each stitch one row of holes up and one row of holes to the left of the previous stitch.
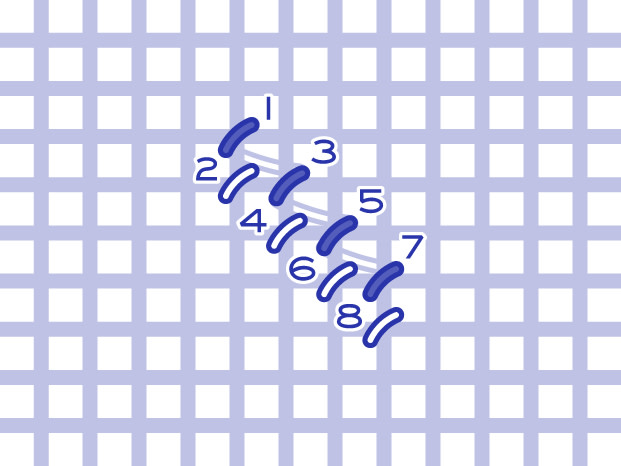
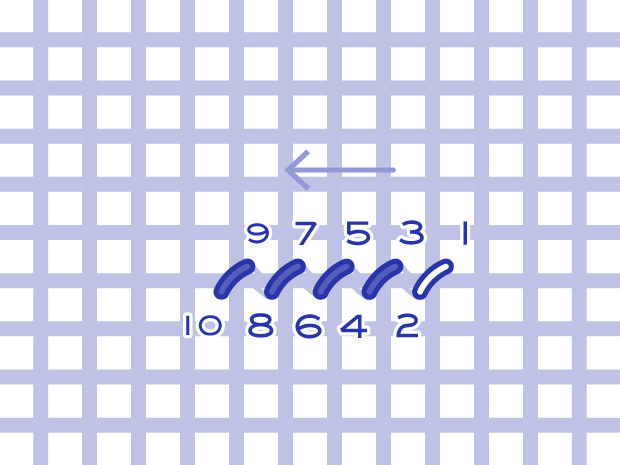
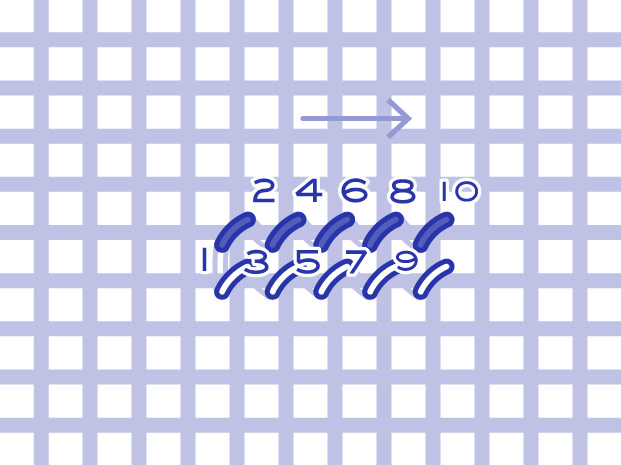
The stitches of the next diagonal row will sit between the stitches of this first row. Bring the needle up two rows of holes above and one row of holes to the right of the end of your last stitch (1). Your diagonal stitches will now be worked top right to bottom left over each intersection of the canvas as shown.
Start at the bottom right hand corner of the section you want to fill. Make the first stitch over an intersection of the canvas from top right (1) to bottom left.(2) Bring your needle up two holes above where you finished the first stitch (3) and make your next stitch by taking it back down to the bottom left (4).
Continue working in diagonal row, each stitch one row of holes up and one row of holes to the left of the previous stitch.
The stitches of the next diagonal row will sit between the stitches of this first row. Bring the needle up two rows of holes above and one row of holes to the right of the end of your last stitch (1). Your diagonal stitches will now be worked top right to bottom left over each intersection of the canvas as shown.
Tent Stitch - Continental
Continental tent stitch can be worked in diagonal or horizontal rows. It creates long diagonal stitches on the back of the work which makes it harder wearing than the half cross method. It's ideal for projects that are going to be subjected to some wear and tear, although it is not as durable as basketweave technique for tent stitch.
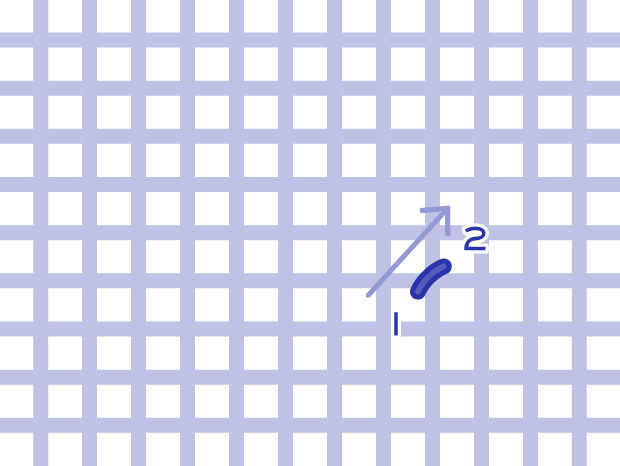
Starting at the bottom right of the section you want to stitch make small diagonal stitches that cover one intersection of the canvas. Work each stitch from bottom left to top right.
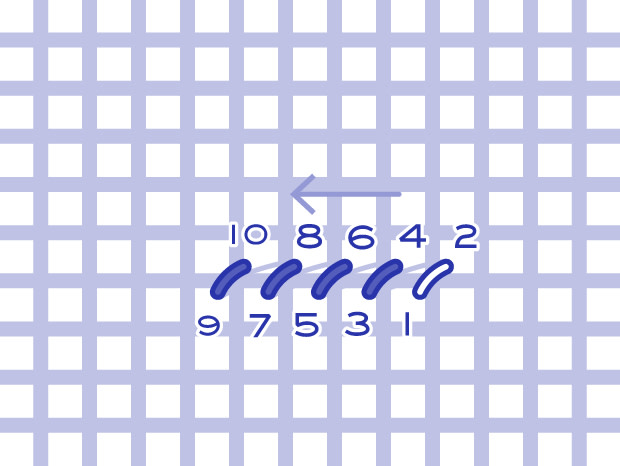
Continue to work from right to left along the row. This will create a long slanted stitch on the back of your work which is what gives this method its durability.
Stitch the next row above the first, reverse the direction of the stitches so that you move from right to left and work each from top right to bottom left.
Starting at the bottom right of the section you want to stitch make small diagonal stitches that cover one intersection of the canvas. Work each stitch from bottom left to top right.
Continue to work from right to left along the row. This will create a long slanted stitch on the back of your work which is what gives this method its durability.
Stitch the next row above the first, reverse the direction of the stitches so that you move from right to left and work each from top right to bottom left.
Tent Stitch - Half Cross
Half cross tent stitch is worked in vertical or horizontal rows. It creates short perpendicular stitches on the back of the work which means it uses less thread. It's ideal for projects that don't need to be particularly hard wearing such as framed pictures or decorative items.
Start in the bottom right hand corner of the section you want to fill. Make you first stitch by bringing the needle up top right (1) and down bottom left (2).
Make a vertical stitch on the back of your canvas then complete the second stitch by bringing your needle down bottom left (4).
To work the next row the order and direction is reversed. You will be working from left to right bringing your needle up bottom left and down top right as shown.