This guide provides step by step diagrams for popular stitches used in cross stitch. It's designed to be a companion to our video tutorials which can be viewed here. Use the links below to jump to specific stitches or scroll through them all for inspiration.
Use these links to jump to the steps and diagrams for key stitches.
Back Stitch
An essential flat stitch that gives a continuous solid line. Very useful for creating outlines.
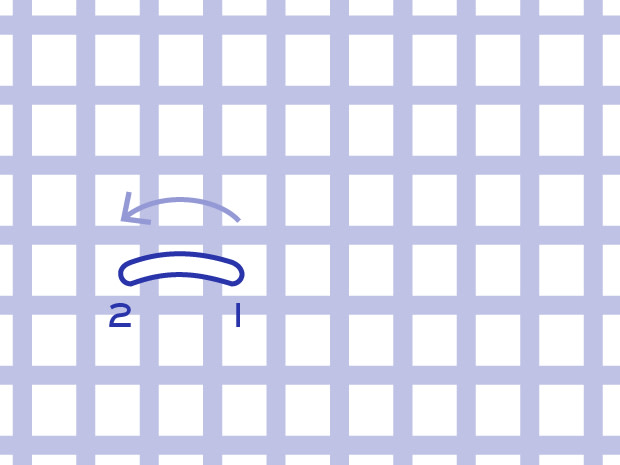
Bring the needle up when you want your line of back stitch to begin. Decide how long you want your stitches to be and take the needle down through the fabric to make the first stitch.
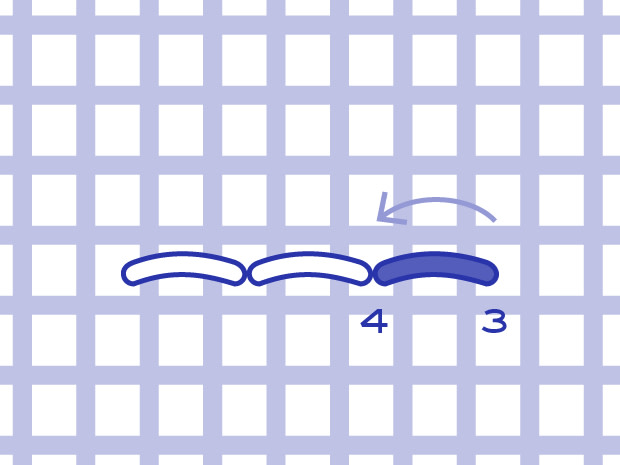
Leave a gap the same length as your stitch and bring the needle up. Working back towards your first stitch make the second stitch by taking the needle down at the end of the first stitch.
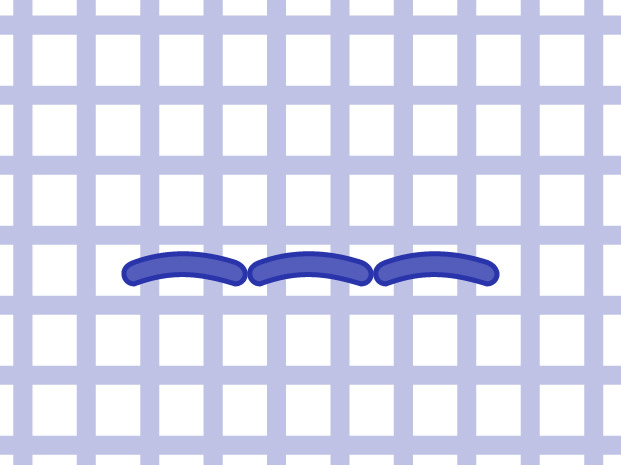
Continue making stitches of equal length coming up one stitch length away and closing the stitch where your previous stitch ended.
Bring the needle up when you want your line of back stitch to begin. Decide how long you want your stitches to be and take the needle down through the fabric to make the first stitch.
Leave a gap the same length as your stitch and bring the needle up. Working back towards your first stitch make the second stitch by taking the needle down at the end of the first stitch.
Continue making stitches of equal length coming up one stitch length away and closing the stitch where your previous stitch ended.
Cross Stitch
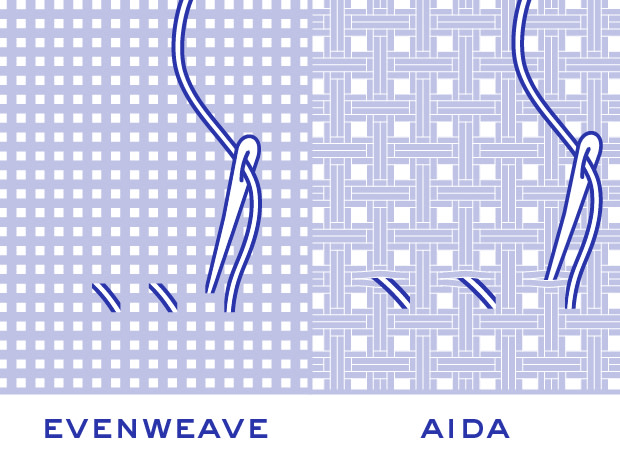
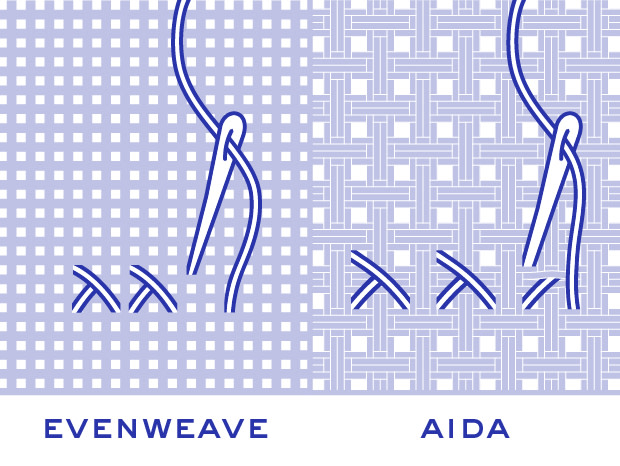
There are two ways to create cross stitch. The English method where each cross is created before the next is begun or the Danish method where a row of half cross stitch is created before completing each cross on the return. Cross stitch is often worked on aida fabric where you form the cross stitches over each intersection of the fabric using the clearly identifiable holes. If you prefer to stitch on linen or evenweave the stitches are commonly made "over 2" meaning each stitch is made across two intersections of thread as shown in the diagrams here.
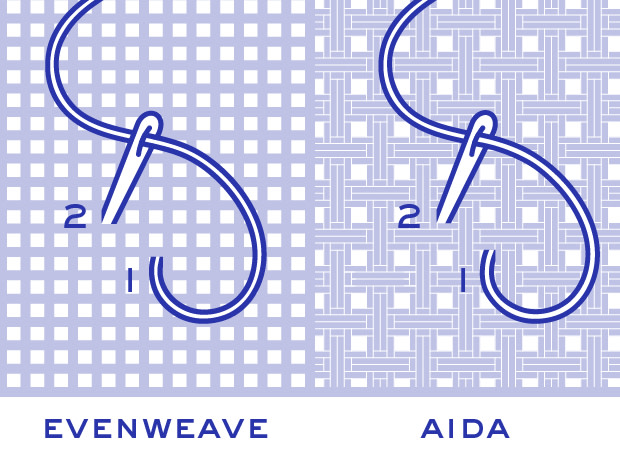
Bring your needle up at 1 (bottom right) and back down at 2 (top left).
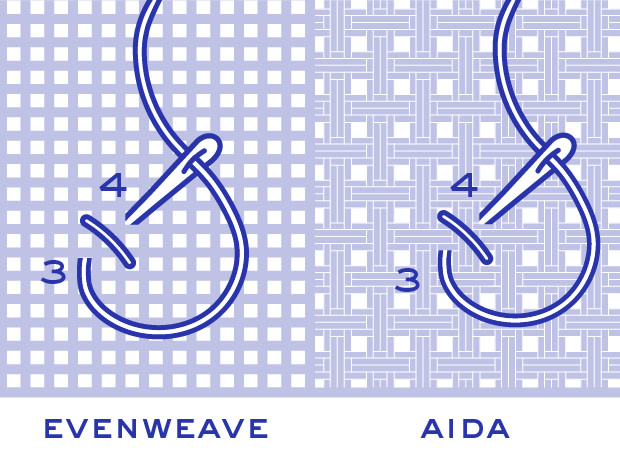
To use the English method bring the needle up at 3 (bottom left) and back down at 4 (top right).
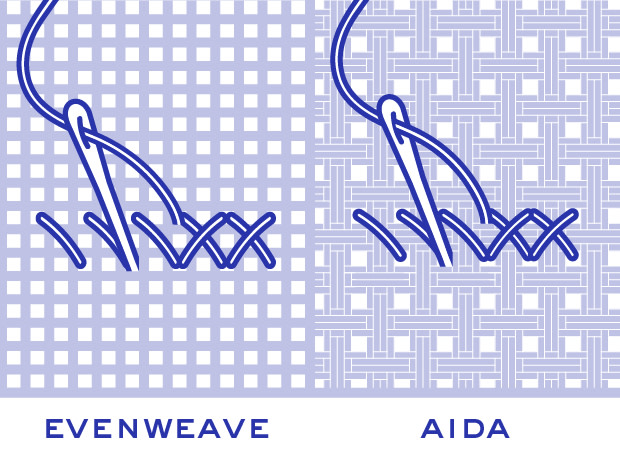
If you prefer to use the Danish method make a row of half cross stitches and complete them on the return.
Bring your needle up at 1 (bottom right) and back down at 2 (top left).
To use the English method bring the needle up at 3 (bottom left) and back down at 4 (top right).
If you prefer to use the Danish method make a row of half cross stitches and complete them on the return.
Fractionals (inc 1/4, 1/2 and 3/4 cross stitches)
Fractional stitches are partial cross stitches that help to create curves in cross stitch designs.
For a 1/4 stitch come up in one corner as shown in your pattern and take the needle back down through the centre of the square. If you are working on aida this will mean wiggling the needle between the fibres.

Bring your needle up at 1 (bottom right) and back down at 2 (top left).
To make a 1/4 stitch into a 3/4 stitch add the appropriate diagonal stitch to a 1/4 stitch. Take care that all the diagonal stitches are done in the consistent order, so whether it is a complete cross stitch or a fractional the top stitches of each cross are lean in the same direction.
For a 1/4 stitch come up in one corner as shown in your pattern and take the needle back down through the centre of the square. If you are working on aida this will mean wiggling the needle between the fibres.
Bring your needle up at 1 (bottom right) and back down at 2 (top left).
To make a 1/4 stitch into a 3/4 stitch add the appropriate diagonal stitch to a 1/4 stitch. Take care that all the diagonal stitches are done in the consistent order, so whether it is a complete cross stitch or a fractional the top stitches of each cross are lean in the same direction.
French Knot
These small knots are great for adding decoration and creating texture. Try scattering them or packing them in close to achieve different effects.
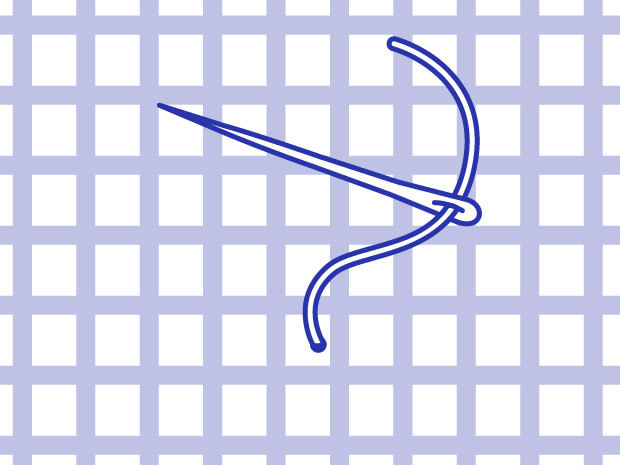
Bring your needle up where you want your french knot to sit.
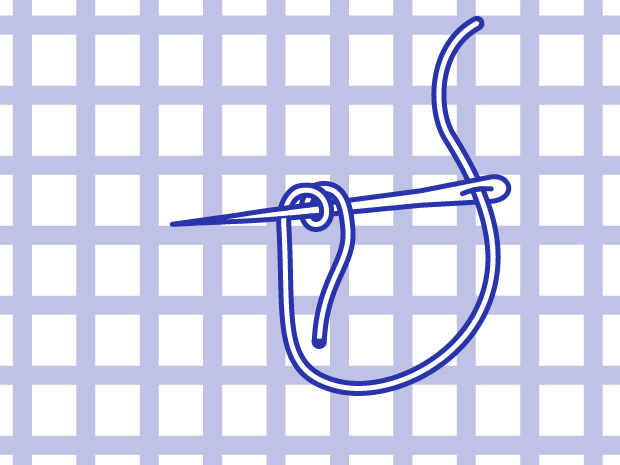
Wrap the thread around the needle close to the surface of the fabric once or twice (depending on how big you want your knot to be).
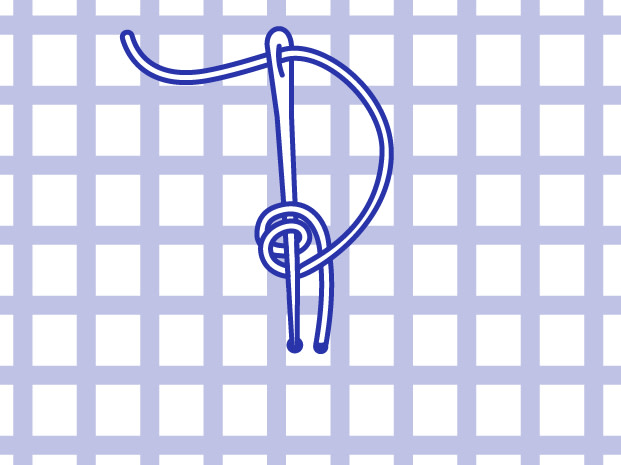
Go back down through the fabric very close to but not in the same hole you came up. Taking care to keep the thread taut until the stitch is completely finished, pull the thread all the way through.
Bring your needle up where you want your french knot to sit.
Wrap the thread around the needle close to the surface of the fabric once or twice (depending on how big you want your knot to be).
Go back down through the fabric very close to but not in the same hole you came up. Taking care to keep the thread taut until the stitch is completely finished, pull the thread all the way through.
Tweeded Cross Stitch
Tweeded Cross stitch is a way of blending colours by combining strands of different coloured embroidery thread in your needle. For example, if you are stitching with two strands of embroidery thread you would thread your needle with one strand of each colour and stitch both of those strands together making your cross stitches in the usual way.